There’s something undeniably delightful about the aroma of freshly baked cookies wafting through your home. Among the myriad of cookie recipes, Danish butter cookies hold a special place in the hearts of many. These melt-in-your-mouth confections are not just any cookies; they embody the essence of Scandinavian baking with their rich, buttery flavor, and a simplicity that speaks volumes. Traditionally enjoyed with tea or coffee, these classic Danish cookies are perfect for any occasion, from holiday gatherings to cozy afternoons with family or friends. Their elegant, buttery texture makes them a beloved treat that’s both kid-friendly and perfect for adults alike. In Denmark, these cookies are often associated with festive celebrations, especially during the Christmas season, where they are beautifully packaged and gifted, showcasing the thoughtfulness of the baker. Interestingly, Danish butter cookies can often be found in beautifully decorated tins, which are not only a treat for the taste buds but also a feast for the eyes, making them a popular gift choice.
This simple butter cookie recipe features just four essential ingredients, making it an accessible choice for bakers of all skill levels. The beauty of these cookies lies in their minimalism—sometimes, less is indeed more. With just butter, sugar, flour, and egg yolk, you can create a batch of cookies that are not only delicious but also incredibly satisfying to make and share. The simplicity of the ingredients allows the buttery flavor to shine through, making each bite a delightful experience. So, grab your mixing bowl and let’s dive into the world of homemade cookies that are bound to impress. You can learn more about this topic and discover the rich history behind these beloved treats.
Ingredients
- 1 cup unsalted butter (softened, at room temperature) – Using unsalted butter gives you control over the saltiness of your cookies, allowing the natural flavors to come through without being overpowered. Make sure the butter is softened for easy mixing; you can achieve this by letting it sit out at room temperature for about 30 minutes before you start. If you’re in a hurry, a quick microwave pulse can soften it, but be careful not to melt it.
- 1/2 cup granulated sugar – This adds sweetness and helps create that beautiful golden color as the cookies bake. The sugar also plays a crucial role in texture, contributing to the cookie’s crisp edges and tender center.
- 2 cups all-purpose flour – The foundation of the cookies, flour gives them structure. For a lighter texture, you may also use cake flour in place of all-purpose flour, which can make the cookies even more delicate.
- 1 large egg yolk – The yolk adds richness and moisture, contributing to a tender crumb. Do not use the egg white in this recipe, as it can alter the texture of the final product, making it less tender and more chewy.
Note: For the best results, use high-quality unsalted butter as it enhances the creamy cookie texture and overall flavor of your Danish butter cookies. Freshly purchased ingredients are vital—old or expired flour can affect the texture and taste significantly. You can also substitute with a non-dairy butter alternative for a vegan version, though it may slightly alter the taste and texture. Consider using coconut oil or a plant-based butter stick, both of which can provide a similar richness. Check out our related guide for more tips on ingredient quality and potential substitutions.
Steps / Instructions
- Preheat Your Oven: Start by preheating your oven to 350°F (175°C). This ensures that your cookies bake evenly and achieve that perfect golden-brown color. An oven thermometer can be useful to check that your oven is at the right temperature; even a slight variation can impact baking results.
- Prepare Your Baking Sheet: Line a baking sheet with parchment paper. This prevents the cookies from sticking and makes for easy cleanup. If you don’t have parchment paper, lightly greasing the baking sheet will also work, but parchment is preferred for the best results, as it helps cookies retain their shape, especially during the cooling process.
- Cream the Butter and Sugar: In a large mixing bowl, using a hand mixer or stand mixer, beat the softened butter and granulated sugar together on medium speed until the mixture is light and fluffy. This should take about 3-5 minutes and is crucial for achieving a light texture in your cookies. Properly creaming the butter and sugar incorporates air, helping the cookies rise as they bake, resulting in a delightful lightness.
- Add the Egg Yolk: Incorporate the egg yolk into the butter-sugar mixture, mixing until fully combined. The yolk adds richness and moisture, essential for the delightful melt-in-your-mouth texture that characterizes traditional Danish butter cookies. Take care to blend it well to ensure a smooth dough.
- Mix in the Flour: Gradually add the all-purpose flour to the mixture. Mix on low speed until the flour is just incorporated. Be careful not to overmix, as this can lead to tough cookies. You may notice the dough becoming thicker; stop mixing as soon as you don’t see any dry flour. The dough should be soft but hold together well without being sticky.
- Shape the Cookies: Using a cookie scoop or your hands, form small balls of dough (about 1 inch in diameter) and place them on the prepared baking sheet, spaced about 2 inches apart. For a classic look, you may flatten them slightly with the back of a fork or your palm. Consider using a piping bag to create fun shapes if you’re feeling creative! This is an opportunity to customize the appearance of your Danish butter cookies.
- Bake: Place the baking sheet in the preheated oven and bake for 12-15 minutes, or until the edges are lightly golden but the centers remain soft. Keep a close eye on them—they can go from perfect to overbaked quickly! Rotating the baking sheet halfway through baking can help them bake evenly, ensuring that all cookies receive equal heat.
- Cool: Once baked, remove the cookies from the oven and allow them to cool on the baking sheet for 5 minutes before transferring them to a wire rack to cool completely. This is important as it allows the cookies to firm up slightly, making them easier to transfer without breaking. The cooling process also develops the flavors further, enhancing your overall cookie experience.
Tips & Tricks
To ensure you achieve the best results with your Danish butter cookies, consider these expert tips:
- Storage: Store your cookies in an airtight container at room temperature for up to one week. For longer storage, you can freeze them for up to three months. Layer parchment paper between the cookies in the container to prevent them from sticking together. Make sure the container is completely sealed to prevent air from making the cookies stale.
- Make-Ahead Options: The cookie dough can be prepared in advance and refrigerated for up to 48 hours before baking. This is perfect for holiday cookie ideas or when you want to enjoy fresh cookies with minimal effort. You can also freeze the rolled dough and slice it into cookies straight from the freezer when you’re ready to bake, which adds convenience to your baking endeavors.
- Avoid Common Mistakes: Be sure to measure your flour accurately—using too much can lead to dry cookies. Spoon the flour into your measuring cup and level it off with a knife for precision. Also, ensure your butter is softened enough; if it’s too cold, it won’t cream properly with the sugar. The texture of your dough is crucial; it should be smooth and slightly tacky but not sticky.
- Pro Techniques: For added flavor, consider incorporating a teaspoon of vanilla extract or almond extract into the dough. This subtle enhancement can elevate your cookies from good to extraordinary. Experimenting with different extracts can create a unique twist, and even adding citrus zest for a refreshing flavor can be delightful. Additionally, sprinkle a pinch of sea salt on top of the cookies before baking for a sophisticated flavor contrast.
Conclusion
These Danish butter cookies are truly a delight, combining simplicity with rich flavor and buttery goodness. They are perfect for any occasion, whether enjoyed during tea time or as a sweet treat after dinner. Engage your loved ones in the baking process, and watch as they light up with joy at the sight and taste of these melt-in-your-mouth cookies. With their straightforward preparation and delectable results, you’ll find that baking these cookies becomes not just a task, but a cherished tradition that brings people together. Don’t hesitate to share your experiences or variations of this recipe as you enjoy the delightful process of making these cookies.
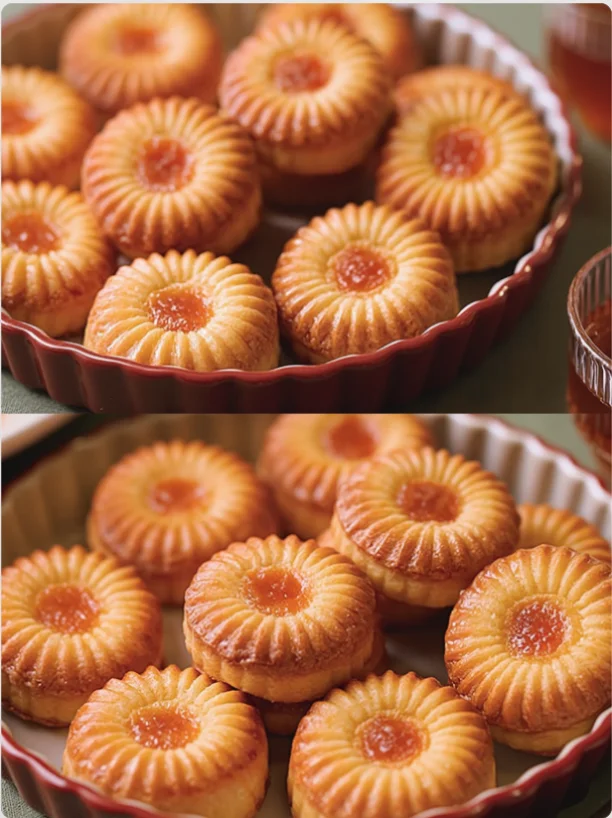
Delightful melt-in-your-mouth confections embodying the essence of Scandinavian baking with their rich, buttery flavor. Perfect for any occasion from holiday gatherings to cozy afternoons.
Ingredients
- 1 cup unsalted butter (softened, at room temperature)
- 1/2 cup granulated sugar
- 2 cups all-purpose flour
- 1 large egg yolk
Instructions
Preheat your oven to 350°F (175°C).
Line a baking sheet with parchment paper.
In a large mixing bowl, beat the softened butter and granulated sugar together on medium speed until light and fluffy (about 3-5 minutes).
Incorporate the egg yolk into the butter-sugar mixture until fully combined.
Gradually add the all-purpose flour to the mixture on low speed until just incorporated.
Form small balls of dough (about 1 inch in diameter) and place them on the prepared baking sheet, spaced about 2 inches apart.
Bake for 12-15 minutes, or until the edges are lightly golden but the centers remain soft.
Cool on the baking sheet for 5 minutes before transferring to a wire rack to cool completely.
Recipe Reviews
- ★★★★★
Excellent recipe!
Leave a Reply
Your email address will not be published. Required fields are marked *

Excellent recipe!