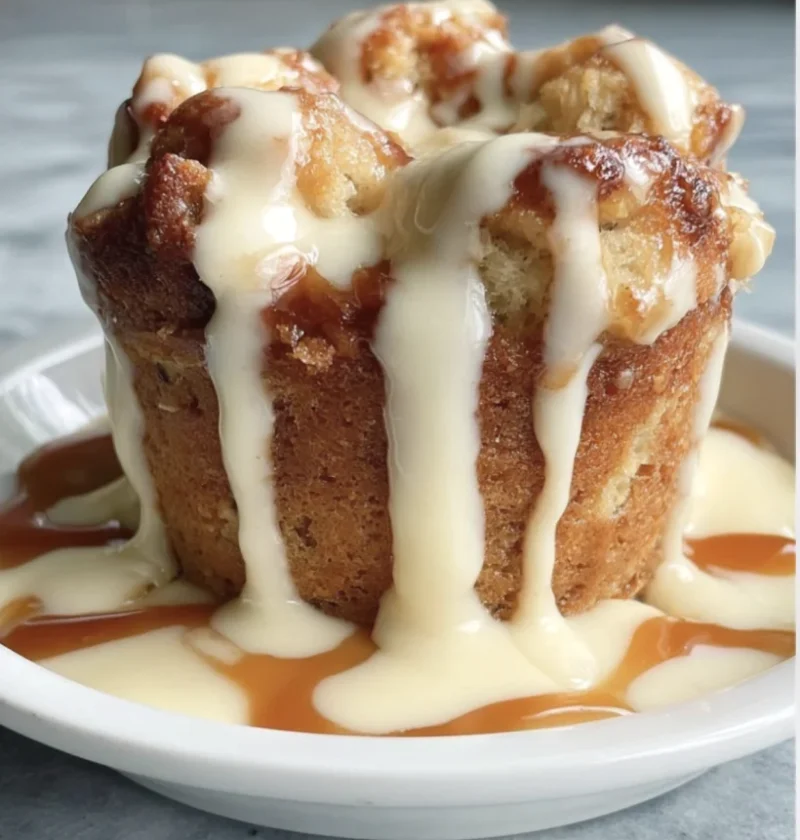
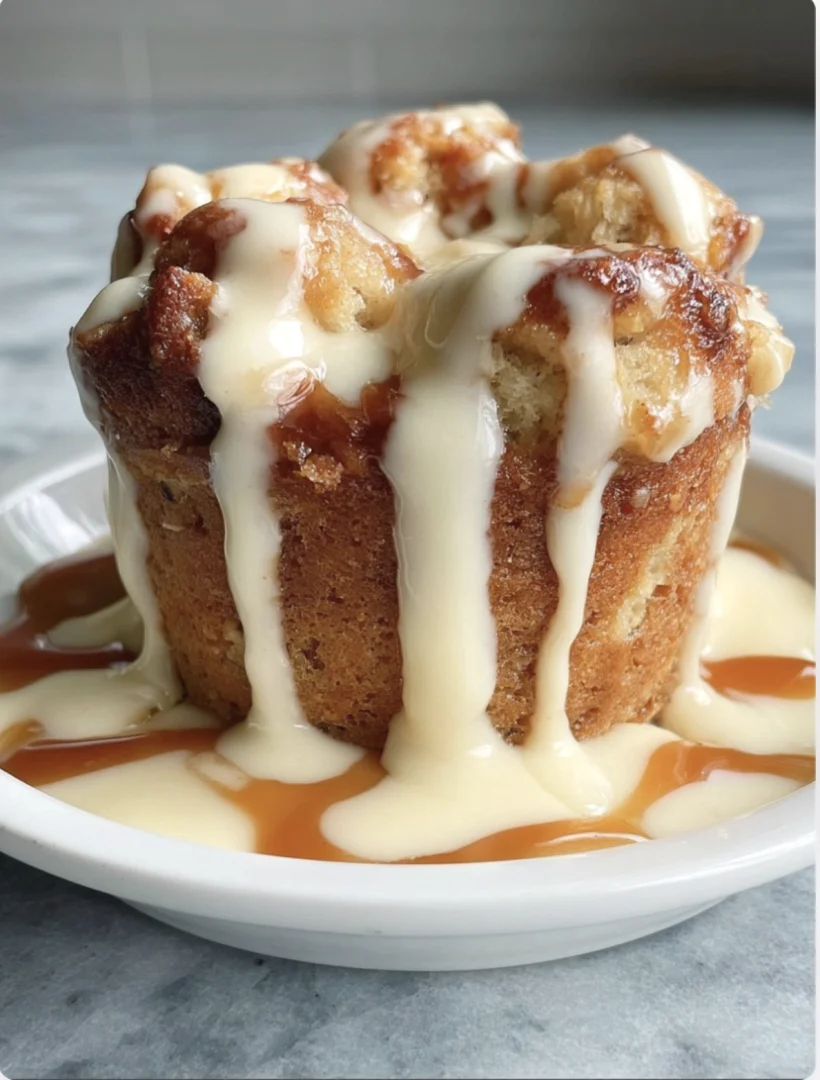
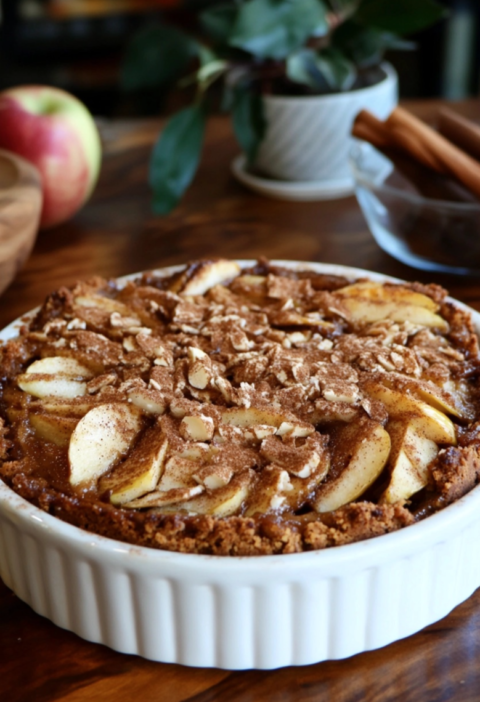
Fall is a season that invites warmth, comfort, and the delightful aroma of baked goods filling the air. One treat that embodies all of these cozy feelings is the Mini Apple Biscuit. These bite-sized pastries combine the flakiness of buttery biscuit dough with a sweet and spiced cinnamon apple filling, making them an irresistible choice for breakfast or dessert. Whether enjoyed on a chilly morning with a steaming cup of coffee or served as a delightful addition to a gathering, these mini treats are sure to impress. The beauty of this recipe lies not only in its deliciousness but also in its simplicity, allowing even novice bakers to create something extraordinary. With just a few steps and some fresh ingredients, you can create a homemade treat that fills your kitchen with the inviting scents of cinnamon and baked apples. Not only do they taste amazing, but they also evoke nostalgic feelings of autumn—like a warm hug on a cool day. Let’s dive into this delicious apple biscuit recipe that celebrates the comforting flavors of fall!
Ingredients
To make these delightful Mini Apple Biscuits, gather the following ingredients: You can learn more about this topic.
- For the Biscuit Dough:
- 2 cups all-purpose flour – for optimal texture, use a high-quality flour that is finely milled. The flour should be measured accurately, as too much can lead to dry biscuits.
- 1 tablespoon baking powder – this helps the biscuits rise and become fluffy, providing that perfect lightness.
- 1/2 teaspoon salt – enhances the flavor by balancing the sweetness, ensuring that the biscuits are not overly sweet.
- 1/4 cup granulated sugar – adds a hint of sweetness to the dough, which complements the apple filling beautifully.
- 1/2 cup unsalted butter, chilled and cubed – cold butter is key for creating flaky layers; ensure it’s well-chilled before use, as this is essential for achieving that ideal texture.
- 3/4 cup milk – whole milk works best for richness, but you can substitute with any milk of choice, including almond or oat milk for a dairy-free option.
- For the Cinnamon Apple Filling:
- 2 medium apples, peeled, cored, and finely chopped (Granny Smith or Honeycrisp are ideal) – choose firm apples for the best texture and flavor contrast; they should be tart enough to balance the sweetness of the sugar.
- 1/4 cup brown sugar – this adds depth and a slight caramel flavor to the filling, creating a delightful contrast with the tartness of the apples.
- 1 teaspoon ground cinnamon – enhances the warmth of the apple filling and gives it that classic fall flavor that many adore.
- 1 tablespoon lemon juice – brightens the flavors and prevents the apples from browning, which is crucial for maintaining a fresh appearance.
- 1 tablespoon cornstarch (to thicken) – helps to bind the filling and gives a nice, cohesive texture, ensuring it doesn’t run out of the biscuits when baked.
- For the Topping:
- 1 egg, beaten (for egg wash) – this will give your biscuits a beautiful, shiny finish, making them look as good as they taste.
- Granulated sugar (for sprinkling on top) – adds a sweet crunch to the tops of the biscuits, enhancing both the visual appeal and flavor.
Steps / Instructions
- Prepare the Oven: Preheat your oven to 425°F (220°C). Line a baking sheet with parchment paper for easy cleanup and to prevent sticking, ensuring a perfect bake without any mess.
- Make the Cinnamon Apple Filling: In a mixing bowl, combine the chopped apples, brown sugar, cinnamon, lemon juice, and cornstarch. Toss together until the apples are well-coated, ensuring the sugar and spices are evenly distributed. Set aside to allow the flavors to meld and the juices to begin to release, intensifying the filling’s flavor. The longer the mixture sits, the deeper the flavors will develop, making it even more delicious.
- Prepare the Biscuit Dough: In a large bowl, mix the all-purpose flour, baking powder, salt, and granulated sugar. Add the chilled cubed butter. Using a pastry cutter or your fingers, work the butter into the flour mixture until it resembles coarse crumbs, with small pea-sized pieces of butter remaining—this step is crucial as it contributes to the biscuits’ flaky texture and ensures they rise properly during baking.
- Add the Milk: Pour in the milk and stir gently until just combined. Be careful not to overmix; a few lumps are okay, as they will help create the desired light texture in the finished biscuits. Overmixing can lead to dense biscuits, so a light hand is key here.
- Roll Out the Dough: Turn the dough out onto a lightly floured surface. Gently knead it a few times until it comes together, about 3-4 turns. Roll the dough out to a thickness of about 1/2 inch, using a floured rolling pin to prevent sticking. Keeping it at the right thickness ensures that the biscuits are baked evenly.
- Cut the Biscuits: Use a biscuit cutter or a glass to cut out circles from the dough. Gather any scraps, re-roll, and cut out more circles until all the dough is used. Aim for uniformity in size for even baking; each circle should be about 2-3 inches in diameter to ensure they cook evenly and look appealing.
- Fill the Biscuits: Place half of the dough circles on the prepared baking sheet. Spoon a generous amount of the cinnamon apple filling onto the center of each circle, making sure to leave a small border so they can seal properly. Top with the remaining dough circles, pressing the edges gently to seal. You can use a fork to crimp the edges for an extra decorative touch, which also helps to ensure the filling doesn’t escape during baking. This step adds not just aesthetics but also a bit of structure to the biscuits.
- Apply Egg Wash: Brush the tops of the biscuits with the beaten egg, taking care to cover the entire surface for uniform coloring, and sprinkle a little granulated sugar on top for added sweetness and a nice crunch. This step is critical for achieving that golden-brown finish that makes these mini apple biscuits so appetizing.
- Bake: Bake in the preheated oven for 12-15 minutes, or until the biscuits are golden brown and puffed up. You’ll know they’re done when they look delightful and smell heavenly! Keep an eye on them during the last few minutes to avoid over-baking, as the perfect timing will yield the best results.
- Cool and Serve: Allow the mini apple biscuits to cool on a wire rack for a few minutes before serving warm. They’re delicious on their own or served with a drizzle of icing or a scoop of vanilla ice cream for an extra indulgent treat! Pairing with a hot beverage like apple cider or coffee can elevate the experience.
Tips & Tricks
- Ingredient Quality: For the best results, use high-quality butter and fresh apples. The type of apple can greatly affect the flavor and texture of your filling, so select varieties that provide a nice balance of sweetness and tartness. Avoid soft or mealy apples, as they won’t hold their shape during baking.
- Storage: Store any leftover mini apple biscuits in an airtight container at room temperature for up to 2 days. For longer storage, refrigerate for up to a week or freeze for up to 3 months. Reheat in the oven for a few minutes to restore their flaky texture, making them taste freshly baked. This makes it a great recipe for meal prep or unexpected guests!
- Make-Ahead: You can prepare the filling ahead of time and refrigerate it for up to 24 hours. The biscuit dough can also be made a few hours in advance and kept in the fridge until you’re ready to bake; just let it sit at room temperature for about 15-20 minutes before rolling out. This can save you time on busy mornings or when entertaining.
- Common Mistakes to Avoid: Be careful not to overwork the biscuit dough, as it can lead to dense biscuits instead of the desired flaky texture. Always handle the dough gently and avoid excessive kneading. Additionally, make sure your baking powder is fresh, as stale leavening agents can result in flat biscuits.
- Biscuit Baking Tips: Ensure your butter is cold before mixing, as this helps create those flaky layers. Also, avoid opening the oven door frequently while baking to maintain a consistent temperature, which is crucial for even baking and rising. A consistent oven temperature is key to achieving that perfect golden-brown crust.
Conclusion
Now that you have the steps to create your own Mini Apple Biscuits, it’s time to embrace the flavors of fall and share these delightful pastries with friends and family. With their flaky texture and comforting apple filling, they make an ideal addition to any breakfast table or dessert spread. Happy baking, and enjoy these warm apple treats! Check out our related guide for more tips on perfecting your baking skills.
Mini Apple Biscuit
These bite-sized pastries combine the flakiness of buttery biscuit dough with a sweet and spiced cinnamon apple filling, making them an irresistible choice for breakfast or dessert.
Ingredients
- 2 cups all-purpose flour
- 1 tablespoon baking powder
- 1/2 teaspoon salt
- 1/4 cup granulated sugar
- 1/2 cup unsalted butter, chilled and cubed
- 3/4 cup milk
- 2 medium apples, peeled, cored, and finely chopped
- 1/4 cup brown sugar
- 1 teaspoon ground cinnamon
- 1 tablespoon lemon juice
- 1 tablespoon cornstarch
- 1 egg, beaten (for egg wash)
- Granulated sugar (for sprinkling on top)
Directions
Preheat your oven to 425°F (220°C). Line a baking sheet with parchment paper.
In a mixing bowl, combine the chopped apples, brown sugar, cinnamon, lemon juice, and cornstarch. Toss until well-coated.
In a large bowl, mix the flour, baking powder, salt, and granulated sugar. Add the chilled butter and mix until it resembles coarse crumbs.
Pour in the milk and stir gently until just combined.
Turn the dough out onto a lightly floured surface and knead a few times until it comes together. Roll out to 1/2 inch thickness.
Use a biscuit cutter or glass to cut out circles. Gather scraps, re-roll, and cut more circles.
Place half of the dough circles on the baking sheet. Spoon a generous amount of the filling onto each circle. Top with remaining circles, pressing edges to seal.
Brush the tops with the beaten egg and sprinkle with granulated sugar.
Bake for 12-15 minutes or until golden brown.
Allow to cool on a wire rack before serving warm.
Nutrition Facts
Recipe Reviews
- ★★★★★
Excellent recipe!
Leave a Reply
Your email address will not be published. Required fields are marked *


Excellent recipe!