Zesty Fermented Veggie Relish
Introduction
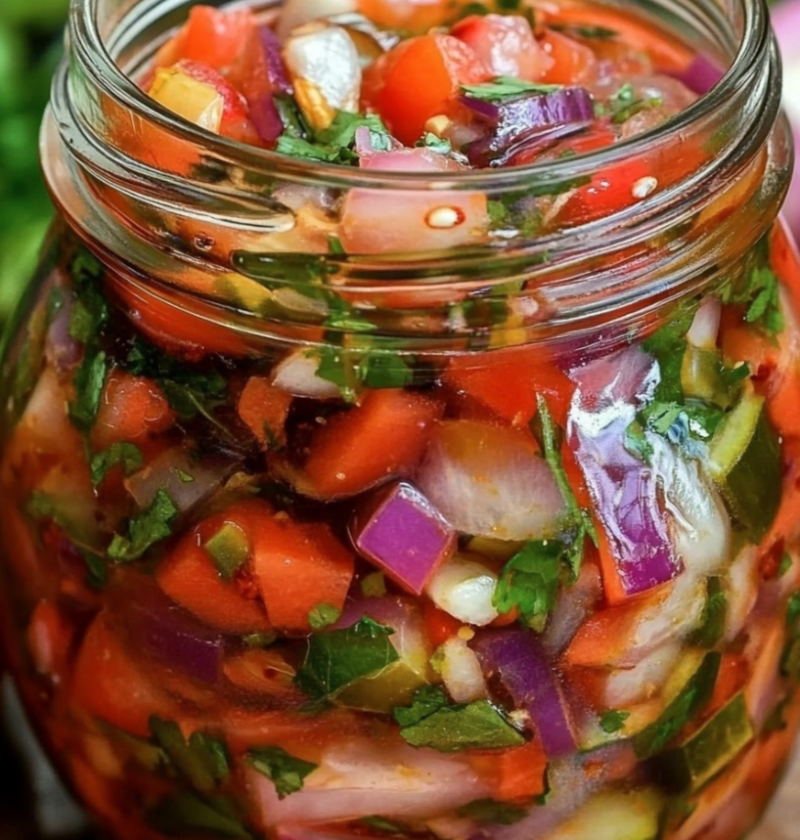
Looking for a tangy and flavorful condiment to elevate your meals? Look no further! This zesty fermented veggie relish is the perfect addition to sandwiches, burgers, salads, and more. Packed with probiotics and bursting with natural flavors, this relish will not only enhance the taste of your dishes but also provide numerous health benefits. Plus, it’s incredibly easy to make at home! Let’s dive into the ingredients and steps to create this delicious relish.
Ingredients
For the Relish:
- 2 cups chopped cabbage
- 1 cup grated carrot
- 1 cup chopped bell peppers (mixed colors)
- 1 cup chopped red onion
- 1 jalapeno pepper, finely chopped (optional for added heat)
- 2 tablespoons sea salt
- 1 tablespoon mustard seeds
- 1 tablespoon fennel seeds
- 1 tablespoon black peppercorns
- 1 tablespoon turmeric powder
For the Brine:
- 4 cups filtered water
- 2 tablespoons apple cider vinegar
- 1 tablespoon sugar
Steps
Step 1: Prepare the Vegetables
Start by washing and sterilizing a glass jar with a tight-fitting lid. Chop the cabbage, grate the carrot, and dice the bell peppers, red onion, and jalapeno pepper (if using). Place all the chopped vegetables in a large mixing bowl.
Step 2: Add the Spices
In a mortar and pestle, coarsely grind the mustard seeds, fennel seeds, and black peppercorns. Add the ground spices to the bowl of vegetables along with the turmeric powder and sea salt. Mix everything well, ensuring the spices are evenly distributed.
Step 3: Pack the Jar
Transfer the vegetable mixture into the sterilized glass jar. Press down firmly with a spoon or your hands to remove any air bubbles and ensure the vegetables are tightly packed.
Step 4: Prepare the Brine
In a separate bowl, combine filtered water, apple cider vinegar, and sugar. Stir until the sugar dissolves completely.
Step 5: Add the Brine
Pour the brine over the vegetables in the jar, making sure they are completely submerged. Leave about an inch of headspace at the top of the jar.
Step 6: Fermentation Process
Seal the jar with the lid and store it in a cool, dark place away from direct sunlight. Allow the vegetables to ferment for at least 3 days, but preferably up to 2 weeks, depending on your taste preference. Check the jar daily for any signs of mold or unwanted fermentation. If mold appears, discard the entire batch.
Step 7: Refrigeration
Once the fermentation period is complete, move the jar to the refrigerator. The relish will continue to develop its flavors over time and can be consumed for up to 3 months.
Variations
This basic fermented veggie relish recipe can be customized to suit your taste and preference. Here are a few variations you can try:
1. Spicy Fermented Relish:
If you enjoy a fiery kick, add more jalapeno peppers or even incorporate some habanero peppers into the mix. Adjust the spice level according to your tolerance.
2. Sweet and Tangy Relish:
Add a tablespoon of honey or maple syrup to the brine mixture for a touch of sweetness. This variation pairs exceptionally well with grilled meats and sandwiches.
3. Mediterranean Twist:
Add some pitted olives, sun-dried tomatoes, and a handful of fresh herbs like basil, oregano, or parsley to give your relish a Mediterranean flair. This version is fantastic in wraps or as a topping for grilled fish.
Tips
- Ensure all the vegetables and utensils used are clean and free from any traces of soap residue, as this can interfere with the fermentation process.
- If you prefer a milder relish, reduce the amount of salt used in the recipe.
- Feel free to experiment with different vegetables like radishes, cucumbers, or even green tomatoes.
- For a crunchier relish, try blanching the vegetables in boiling water for a minute before packing them into the jar.
Conclusion
Creating your own zesty fermented veggie relish is a fantastic way to add flavor and nutrition to your meals. The natural fermentation process not only enhances the taste but also increases the nutritional value of the vegetables. With a few simple steps and minimal ingredients, you can enjoy this tangy condiment that will take your culinary creations to a whole new level.
FAQs
Q: Can I use a plastic jar instead of a glass jar for fermentation?
A: It is recommended to use a glass jar for fermentation as plastic can sometimes retain odors and flavors from previous uses, which may affect the taste of your relish.
Q: How do I know if the relish has gone bad?
A: If you notice an off smell, unusual colors, or mold growth, it is best to discard the entire batch. Fermentation should result in a tangy and pleasant aroma.
Q: Can I adjust the amount of spices used in the recipe?
A: Absolutely! Feel free to experiment with the spice levels to suit your taste preferences. You can increase or decrease the amount of spices according to your liking.
Q: Can I reuse the brine for another batch of relish?
A: While it is possible to reuse the brine, it is recommended to make a fresh batch for each fermentation cycle to ensure consistency and avoid any potential contamination.
Q: How long does it take for the relish to ferment?
A: The fermentation time can vary depending on factors such as temperature and personal preference. It is recommended to ferment the relish for at least 3 days, but for a more pronounced flavor, you can let it ferment for up to 2 weeks.
Now that you have all the information you need, it’s time to get fermenting! Enjoy the process of creating your own zesty fermented veggie relish and savor the incredible flavors it brings to your meals.