Making homemade bread can be a fulfilling and delicious endeavor, but sometimes it’s hard to find the time to do it from scratch. That’s where Easy Freeze Bread Dough comes to the rescue. With this method, you can prepare your bread dough ahead of time, freeze it, and have fresh bread on demand with minimal effort. This versatility not only saves time on busy days, but it also allows you to enjoy the delightful aroma of freshly baked bread whenever the mood strikes. This technique is perfect for busy families or anyone who loves the taste of homemade bread but struggles to fit baking into their schedule. The simplicity of this process, combined with the satisfaction of creating something from scratch, makes baking with Easy Freeze Bread Dough a rewarding experience that can transform your meals and snacks into moments of joy. Imagine the smell of baking bread wafting through your home, inviting everyone to gather around the kitchen as you slice into a warm loaf, ready to be slathered with butter or enjoyed with your favorite jam. The anticipation of a fresh loaf can elevate even the simplest of meals to something extraordinary, and knowing you have dough ready to go will make you feel like a kitchen pro.
Ingredients
Gather the following ingredients for your Easy Freeze Bread Dough: You can learn more about this topic.
- Dry Ingredients:
- 4 cups all-purpose flour (or bread flour for better structure; bread flour has more protein which helps create a chewier texture, perfect for sandwiches and toasting. Using a flour that has been milled recently can also improve flavor and performance.)
- 2 teaspoons salt (this not only adds flavor but also strengthens the gluten structure, playing a vital role in the bread’s overall texture. Remember that salt can also inhibit yeast activity, so it’s important to mix it with the flour rather than directly with the yeast.)
- 1 tablespoon sugar (this helps feed the yeast, promoting a better rise and adding a hint of sweetness, which balances the flavors in your bread. The sugar also aids in the browning process of the crust during baking.)
- 2 teaspoons instant yeast (unlike active dry yeast, instant yeast can be mixed directly into dry ingredients without proofing, making it quicker and easier to work with. Instant yeast is often a baker’s choice for its reliability and convenience.)
- Wet Ingredients:
- 1 ½ cups warm water (about 110°F or 43°C; it’s important to use warm water to activate the yeast without killing it, as too hot water can hinder yeast activity. Using filtered water can also improve the quality of your bread.)
- 2 tablespoons olive oil (optional, for richness; adds flavor and improves the dough’s texture by making it softer, which is especially beneficial for softer bread types. Experimenting with flavored oils, like garlic or herb-infused olive oil, can add an exciting twist to your dough.)
Note: Using high-quality ingredients makes a significant difference in the flavor and texture of your bread. Opt for unbleached flour for better flavor and texture, as bleached flour can alter the taste and structure negatively. If you prefer whole grain bread, substitute part of the all-purpose flour with whole wheat flour to introduce nuttiness and added fiber without compromising the dough’s integrity. Check out our related guide for more tips on choosing the right ingredients and their impacts on your final product. Understanding the role of each ingredient will empower you to make adjustments based on your preferences and dietary needs, allowing you to tailor your bread to suit your tastes and lifestyle.
Steps / Instructions
- Mix Dry Ingredients: In a large mixing bowl, combine the flour, salt, sugar, and instant yeast. Stir until evenly mixed, ensuring there are no lumps, as this ensures even distribution of the yeast and other ingredients. This step is crucial for achieving uniform texture and rise in your final bread. Consider using a whisk to aerate the flour and help blend it more thoroughly.
- Add Wet Ingredients: Pour the warm water and olive oil into the dry mixture. Stir with a wooden spoon or spatula until a shaggy dough begins to form. The dough will look rough and slightly sticky, which is normal. If the mixture seems too dry, add a tablespoon of warm water at a time until the desired consistency is reached. Feel free to experiment with adding herbs or spices at this stage for a unique flavor.
- Knead the Dough: Transfer the dough onto a lightly floured surface. Knead for about 8-10 minutes, or until the dough is smooth and elastic. If using a stand mixer, knead with a dough hook for 5-7 minutes on medium speed. You’ll know the dough is ready when it springs back when poked and feels slightly tacky but not sticky, indicating the gluten has developed properly. If you find the dough too sticky, add small amounts of flour sparingly during kneading to avoid over-flouring.
- First Rise: Place the kneaded dough in a greased bowl, cover it with a damp cloth or plastic wrap, and let it rise in a warm place until doubled in size, about 1-2 hours. For best results, place it in an oven with just the light on or in a warm, draft-free area. You can also place a bowl of hot water in the oven to create a warm environment for rising. This step enhances the flavor and texture significantly, allowing the yeast to work its magic. Keep an eye on the dough; sometimes it may rise faster or slower based on the room temperature.
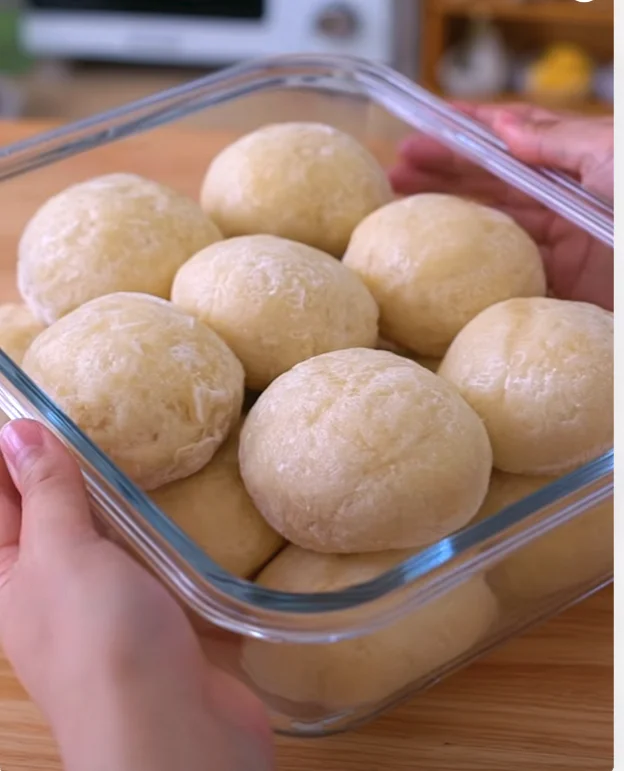
- Shape the Dough: Once risen, punch down the dough to release air. Shape it into a ball or divide it into smaller portions for rolls or pizza dough, ensuring a light touch to maintain some air pockets for a fluffy texture. Consider using a bench scraper to help manage the dough without deflating it too much. This gentle handling is key to achieving a light and airy bread.
- Prepare for Freezing: If freezing, wrap the shaped dough tightly in plastic wrap and then place it in a freezer bag. Be sure to label the bag with the date and type of dough. You can also freeze dough in portioned shapes if you plan to make easy dinner rolls, ensuring each portion is wrapped well to prevent freezer burn. Proper wrapping is essential for preserving flavor and preventing freezer odors from seeping into the dough. You might consider portioning the dough into various sizes for different uses, such as smaller rolls for sliders or larger portions for loaves.
- Freeze the Dough: Place the wrapped dough in the freezer. It can be stored for up to 3 months, though for the best results, use it within a month. When you’re ready to bake, the sooner you use it, the better the flavor and texture will be. Remember that while frozen dough is convenient, using it fresh yields the best results. When thawing, you may find that the dough develops a richer flavor due to the cold fermentation process.
Tips & Tricks
Here are some essential tips for success with your Easy Freeze Bread Dough:
- Thawing Frozen Bread Dough: When ready to bake, remove the dough from the freezer, unwrap it, and place it in a greased bowl. Cover it and let it thaw in the refrigerator overnight or at room temperature for 4-6 hours until it has doubled in size. This gradual thawing helps to maintain the dough’s texture and flavor, ensuring a great final product. If you’re pressed for time, a quicker thaw method is to place the dough in a warm area, but this may affect the final texture slightly.
- Baking Temperature: Preheat your oven to 375°F (190°C) before baking. Brush the top with melted butter or an egg wash for a glossy finish. A hot oven is essential for a good oven spring, allowing your bread to rise beautifully as it bakes. Additionally, consider placing a pan of water in the oven to create steam, which helps develop a crusty exterior. Using a thermometer to check the internal temperature of the bread (around 190°F or 88°C) will ensure it’s thoroughly baked.
- Baking Tools: Use a sturdy baking sheet or a cast-iron skillet for artisan-style bread, which can help achieve a crusty exterior. For easier cleanup, use parchment paper to line your baking sheet, allowing for effortless bread removal once baked. Investing in a good-quality baking stone can also enhance your baking experience, providing even heat distribution and a perfect crust.
- Common Mistakes: Ensure your yeast is fresh and active; using expired yeast can lead to disappointing results. If your dough isn’t rising properly, the water temperature may have been too hot or too cold. Always double-check the temperature to ensure optimal yeast activation. Another common mistake is overcrowding the baking sheet; give each piece of dough enough space to rise and bake evenly. Lastly, resist the urge to slice into the bread right away; let it cool completely to avoid a gummy texture in the center.
Easy Freeze Bread Dough
A method to prepare bread dough ahead of time, freeze it, and have fresh bread on demand with minimal effort.
Ingredients
- 4 cups all-purpose flour (or bread flour)
- 2 teaspoons salt
- 1 tablespoon sugar
- 2 teaspoons instant yeast
- 1 ½ cups warm water (about 110°F or 43°C)
- 2 tablespoons olive oil (optional)
Directions
In a large mixing bowl, combine the flour, salt, sugar, and instant yeast. Stir until evenly mixed.
Pour the warm water and olive oil into the dry mixture. Stir until a shaggy dough begins to form.
Transfer the dough onto a lightly floured surface. Knead for about 8-10 minutes, or until the dough is smooth and elastic.
Place the kneaded dough in a greased bowl, cover it with a damp cloth, and let it rise in a warm place until doubled in size, about 1-2 hours.
Once risen, punch down the dough to release air. Shape it into a ball or divide it into smaller portions.
If freezing, wrap the shaped dough tightly in plastic wrap and then place it in a freezer bag.
Place the wrapped dough in the freezer. It can be stored for up to 3 months.
Recipe Reviews
- ★★★★★
Excellent recipe!
Leave a Reply
Your email address will not be published. Required fields are marked *


Excellent recipe!