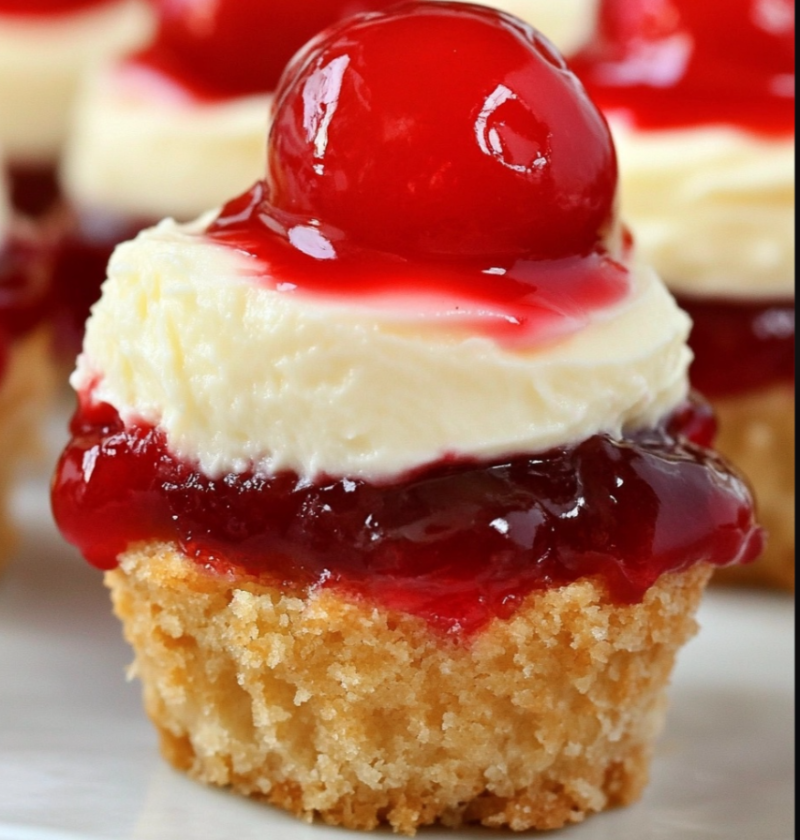
Mini Cherry Cheesecakes: A Bite-Sized Treat for Cheesecake Lovers
Introduction
Who doesn’t love a creamy, rich slice of cheesecake? It’s a classic dessert that never fails to satisfy our sweet tooth. But what if we could enjoy this indulgent treat in a bite-sized form? That’s where Mini Cherry Cheesecakes come in. These adorable little desserts are not only delicious but also perfect for parties, potlucks, or simply treating yourself to a mini-dessert. In this article, we’ll walk you through the process of making these delightful treats step by step, and even provide you with some variations and tips to make them even more special.
Ingredients
For the crust:
- 1 ½ cups graham cracker crumbs
- ¼ cup melted butter
- 2 tablespoons granulated sugar
For the filling:
- 2 packages (8 oz each) cream cheese, softened
- ½ cup granulated sugar
- 2 tablespoons all-purpose flour
- 2 teaspoons vanilla extract
- 2 eggs
For the topping:
- 1 can (21 oz) cherry pie filling
Steps
Step 1: Preparing the Crust
First, preheat your oven to 325°F (160°C). In a medium-sized bowl, combine the graham cracker crumbs, melted butter, and granulated sugar. Mix well until the crumbs are evenly coated with butter and sugar.
Next, line a muffin tin with paper liners. Spoon about a tablespoon of the graham cracker mixture into each liner. Use the back of a spoon to press the crumbs down firmly, creating a compact crust.
Step 2: Making the Creamy Filling
In a large mixing bowl, beat the softened cream cheese until smooth and creamy. Add the granulated sugar, flour, and vanilla extract. Mix well until all the ingredients are fully incorporated.
Then, add the eggs one at a time, beating well after each addition. Continue to beat the mixture until it becomes smooth and velvety.
Step 3: Assembling and Baking
Spoon the cream cheese filling on top of the graham cracker crust in each liner, filling them almost to the top. Smooth out the surface of the filling with a spoon or spatula.
Place the muffin tin in the preheated oven and bake for about 20 minutes, or until the edges of the cheesecakes are set but the centers are slightly jiggly. Remove from the oven and let them cool in the tin for 5 minutes.
Step 4: Adding the Topping
Once the cheesecakes have slightly cooled, top each one with a spoonful of cherry pie filling. You can be as generous as you like, covering the entire surface or leaving some of the creamy filling peeking through.
Refrigerate the mini cherry cheesecakes for at least 2 hours, or until they are completely chilled and set.
Variations
While these Mini Cherry Cheesecakes are delightful on their own, you can also experiment with different flavors and toppings to make them even more exciting:
- Chocolate Lovers: Add ¼ cup of cocoa powder to the cream cheese filling for a rich chocolatey twist. Top with chocolate shavings or a dollop of chocolate ganache.
- Fruit Medley: Instead of cherry pie filling, try using blueberry, strawberry, or raspberry pie filling for a burst of fruity goodness.
- Cookie Crumble: Swap out the graham cracker crumbs for crushed Oreos or your favorite cookie to create an alternative crust.
Tips
Here are a few tips to help you achieve perfect Mini Cherry Cheesecakes:
- Make sure the cream cheese is softened at room temperature before using it. This will ensure a smooth and creamy filling without any lumps.
- Be careful not to overmix the cream cheese filling once the eggs are added. Overmixing can lead to a dense and heavy texture.
- If you don’t have a muffin tin, you can use a mini cheesecake pan or even a silicone mold to create individual servings.
- For an extra touch of elegance, garnish each cheesecake with a fresh cherry or a mint leaf before serving.
Conclusion
Mini Cherry Cheesecakes are the perfect bite-sized treats for cheesecake lovers. With their creamy filling, buttery crust, and sweet cherry topping, they are sure to impress your guests and satisfy your dessert cravings. Whether you’re hosting a party or simply treating yourself, these mini desserts are easy to make and guaranteed to bring a smile to your face. So go ahead and give this recipe a try, and enjoy every delightful bite!
FAQs
1. Can I use a different flavor of pie filling?
Yes, absolutely! While this recipe calls for cherry pie filling, you can easily substitute it with your favorite fruit pie filling, such as blueberry, strawberry, or raspberry.
2. Can I make these ahead of time?
Yes, you can make these Mini Cherry Cheesecakes ahead of time. Simply prepare and bake them as instructed, and then store them in the refrigerator for up to 2 days. Add the cherry pie filling just before serving.
3. Can I freeze these mini cheesecakes?
Yes, you can freeze these Mini Cherry Cheesecakes for up to 1 month. Make sure to wrap them tightly in plastic wrap or place them in an airtight container before freezing. Thaw them in the refrigerator overnight before serving.