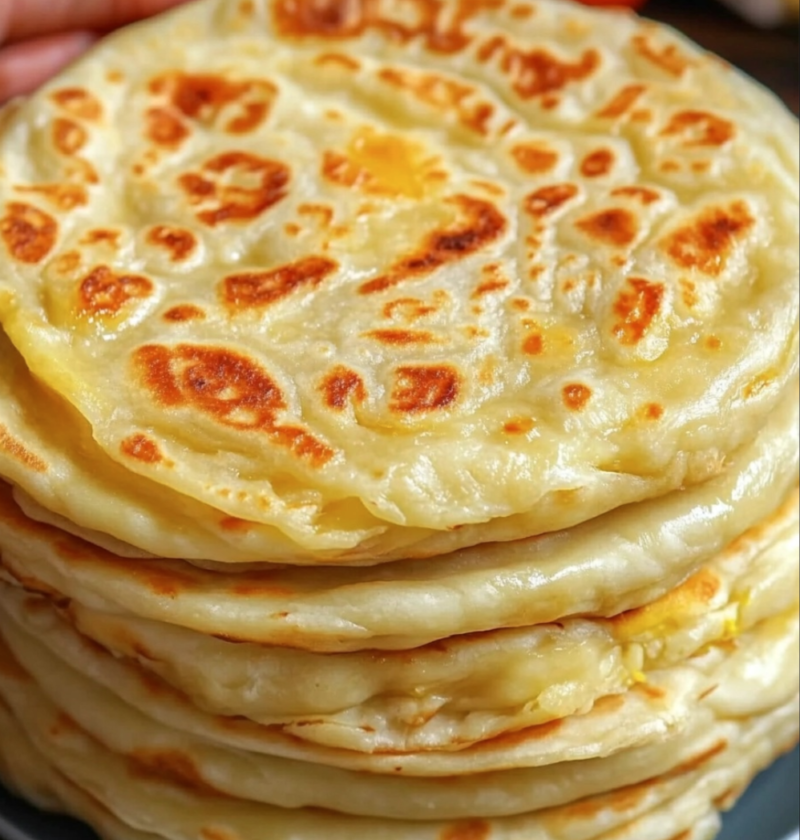
Buttery Paratha Perfection
Introduction
If you are a fan of Indian cuisine, you have likely heard of parathas. These delicious and flaky flatbreads are a staple in many households and are often enjoyed with a variety of curries, chutneys, and pickles. One of the most beloved variations of parathas is the buttery paratha. The combination of rich, flaky bread and a generous slathering of butter makes these parathas irresistible. In this recipe, we will guide you through the process of making buttery parathas that are sure to satisfy your cravings.
Ingredients
Dough:
- 2 cups all-purpose flour
- 1/2 teaspoon salt
- 1 tablespoon oil
- 3/4 cup water (adjust as needed)
For Layering:
- 1/4 cup melted butter
- Additional flour for dusting
Steps
Step 1: Prepare the Dough
In a large mixing bowl, combine the all-purpose flour and salt. Mix well to ensure the salt is evenly distributed. Add the oil and mix it into the flour using your fingertips until the mixture resembles coarse crumbs.
Gradually add water, a little at a time, and knead the dough until it comes together. The dough should be soft and pliable, but not sticky. Adjust the amount of water or flour as needed to achieve the desired consistency.
Once the dough is ready, cover it with a damp cloth and let it rest for at least 15 minutes. This will allow the gluten to relax and make the dough easier to roll out.
Step 2: Roll and Layer the Parathas
Divide the dough into small balls, roughly the size of a golf ball. Dust each ball with flour and roll it out into a thin circle, about 6-7 inches in diameter.
Brush the surface of the rolled-out dough with melted butter. Sprinkle a little flour over the buttered surface.
Now, fold the dough in half to form a semicircle. Brush the surface of the semicircle with butter and sprinkle flour on top again. Fold the semicircle in half once more to form a triangle.
Repeat this process with the remaining dough balls, stacking the folded triangles on a plate. This layering technique will create the flaky texture that is characteristic of parathas.
Step 3: Roll and Cook the Parathas
Take one folded triangle and dust it with flour. Gently roll it out into a larger triangle, keeping the layers intact. Aim for a thickness of about 1/8 inch.
Heat a tawa or a flat skillet over medium heat. Place the rolled-out paratha on the hot tawa and cook for about a minute, or until bubbles start to appear on the surface.
Flip the paratha and spread some melted butter on the cooked side. Cook for another minute, pressing down gently with a spatula to ensure even cooking and browning.
Flip the paratha once more and spread butter on the other side. Continue cooking and flipping the paratha until it is golden brown and crispy on both sides. Repeat this process with the remaining rolled-out triangles.
Variations
While the basic buttery paratha recipe is delicious on its own, you can experiment with different flavors and fillings to add a twist to your parathas. Here are a few variations you can try:
1. Garlic Butter Paratha:
Mince a few cloves of garlic and mix them with melted butter. Spread this garlic butter mixture on the rolled-out parathas before cooking. The addition of garlic will give the parathas a deliciously aromatic flavor.
2. Cheese Paratha:
Grate your favorite cheese, such as cheddar or mozzarella, and sprinkle it over the rolled-out parathas. Fold the parathas as usual and cook them until the cheese melts and becomes gooey. Serve these cheesy parathas with a side of tomato ketchup or a spicy chutney.
3. Aloo Paratha:
Mash boiled potatoes and mix them with finely chopped onions, green chilies, and a blend of spices such as cumin, coriander, and turmeric. Stuff this potato mixture into the rolled-out parathas and cook them until they turn golden brown. Serve these flavorful aloo parathas with yogurt or a tangy pickle.
Tips
Here are some tips to ensure your buttery parathas turn out perfectly every time:
- Make sure the dough is well-rested before rolling it out. This will make it easier to roll and prevent the parathas from shrinking while cooking.
- Use a non-stick skillet or tawa to prevent the parathas from sticking and to ensure even cooking.
- Maintain medium heat while cooking the parathas. Too high heat will burn them, and too low heat will make them greasy.
- Feel free to adjust the amount of butter according to your preference. If you prefer a lighter version, you can reduce the amount of butter used.
Conclusion
Buttery parathas are a delightful addition to any meal. With their flaky layers and rich buttery flavor, they are sure to please your taste buds. Whether enjoyed with a spicy curry or as a standalone snack, these parathas are the epitome of comfort food. So, roll up your sleeves, follow this recipe, and indulge in the buttery goodness of homemade parathas.
FAQs
1. Can I use whole wheat flour instead of all-purpose flour?
Yes, you can substitute all-purpose flour with whole wheat flour for a healthier alternative. However, keep in mind that the texture and taste of the parathas may differ slightly.
2. Can I make the dough in advance?
Yes, you can prepare the dough in advance and store it in the refrigerator for up to 24 hours. Just make sure to bring it back to room temperature before rolling and cooking the parathas.
3. Can I freeze the parathas?
Yes, you can freeze the parathas after cooking them. Allow them to cool completely, stack them with parchment paper between each paratha, and store them in an airtight container or freezer bag. When ready to eat, thaw them in the refrigerator and reheat them on a tawa or in a microwave.
Now that you have all the necessary information, it’s time to embark on your buttery paratha-making journey. Enjoy the process and relish the delicious results!